VPS & Dedicated Hosting: Increasing Resources Through WHM
Managing your website’s bandwidth is crucial to ensure a smooth performance and avoid downtime, especially if you’re running a high-traffic site. Bluehost's guide on increasing resources through WHM (Web Host Manager) provides a comprehensive walkthrough for VPS and Dedicated server users. With these steps, you can easily allocate additional bandwidth to your site, ensuring it can handle increased traffic without issues.
- Disk Space
- Bandwidth
- Summary
Disk Space
To increase your client's disk space, please do the following:
-
Log in to your Bluehost Account Manager.
-
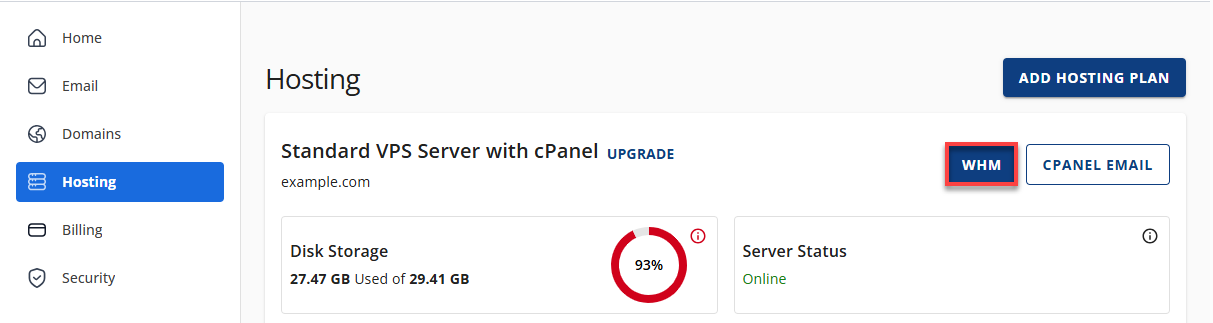
Click Hosting in the left-hand menu.
-
In the hosting details page, click the WHM button.
-
In the menu to the left, under Account Functions, click Quota Modification.
- You can also click Show all Accounts to change multiple accounts at once.
- Select the Domain or User you wish to modify and click Modify.
- Change the Quota value for the package(s) selected and click Save.
You may also make changes to the package in case you want multiple customers to have the increase.
Bandwidth
Ensure you have first upgraded the site to a package that suits its needs by doing the following:
-
Log in to your Bluehost Account Manager.
-
Click Hosting in the left-hand menu.
-
In the hosting details page, click the WHM button.
-
Under Account Functions, click Upgrade/Downgrade an Account.
-
Select the domain you wish to make the changes to and click Modify.
-
Select the package you wish the domain to be upgraded to and click Upgrade/Downgrade.
Still having the problem? cPanel doesn't recognize the update immediately. To expedite the process:
-
Log in to your Bluehost Account Manager.
-
Click Hosting in the left-hand menu.
-
In the hosting details page, click the WHM button.
-
Under Account Functions , click the Limit Bandwidth Usage.
-
Select the domain you wish to make the changes to and click the Limit button.
-
Increase the Bandwidth Limit and click the Change button.
-
Refresh the site in your browser.
Please note that these limits only apply to http bandwidth usage and not the total bandwidth usage for an account.
Summary
Increasing the bandwidth on your site through WHM is not a complicated process, but it does give your site an immense boost in performance and reliability. If you are going through a spike of traffic, then changing the bandwidth setting on your account will ensure your site remains up and running with full efficiency. You can further contact Bluehost for support by using their live chat or phone number so that you encounter a smooth transition as you implement these changes.