VPS & Dedicated Hosting: How to Enable Non-Legacy Backups
Need to enable non-legacy backups on your Bluehost VPS or Dedicated server? No problem! This guide will walk you through the process step-by-step, making it super easy to configure your backups in WHM and keep your website data safe and sound. Click on any of the sections to jump to that point in the guide.
- Getting Started
- User Selection
- Enable the Non-Legacy Backups
- Summary
Getting Started
You will need the password for the root user so that you can log in to WHM. Once logged in, Disable the Legacy Backups. When the Legacy option has been disabled, you can select users and configure your new backup option.
User Selection
- In the search bar on the top left side of the WHM, type Backup.
- In the search results, click on Backup User Selection.
- Turn Legacy to Off and Backups to On.
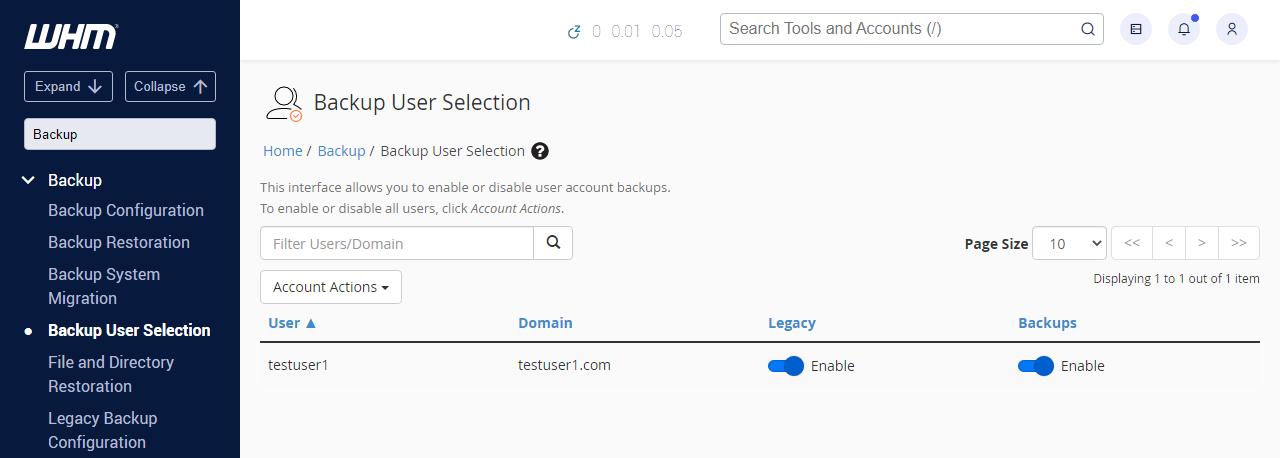
If you have multiple accounts, you can turn them all on or off at once using the checkbox to the right of the page navigation.
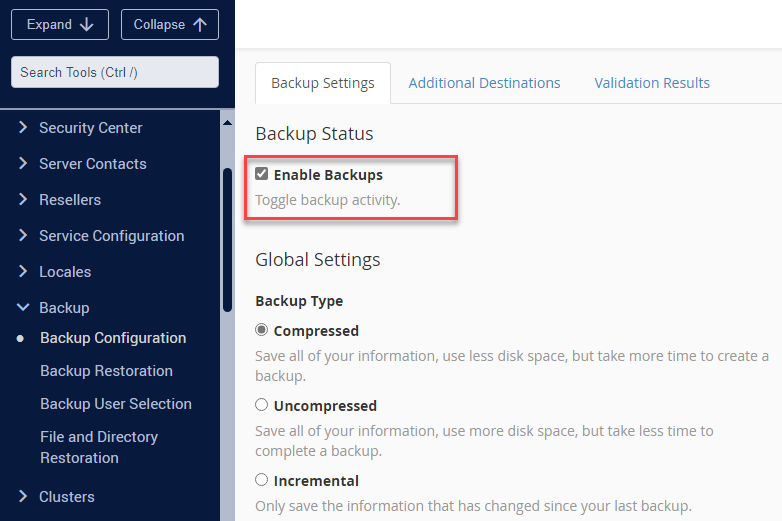
Enable the Non-Legacy Backups
-
In the search bar on the top left side of the WHM, type Backup.
-
In the search results, click on Backup Configuration.
-
Change Backup Status to Enable.
-
Click the Save Configuration button at the bottom of the screen.
You have now configured your server to use the new backup system.
Summary
That's it! Your Bluehost VPS or Dedicated server now has non-legacy backups enabled. You can now relax knowing that the data on your website is safely backed up and prepared for restoration in case it becomes necessary. The support staff at Bluehost is always available to assist you with any further inquiries.