How to Drop Tables in phpMyAdmin: Permanently Delete Tables
With phpMyAdmin, dropping tables is a simple procedure that lets you permanently remove tables and all their contents from your database. In this guide, we'll review the necessary steps to drop tables in phpMyAdmin safely. Ensure no apps rely on the data you will remove, whether handling out-of-date tables, cleaning up your database, or addressing common WordPress issues. It is recommended that you make a backup before you perform any actions, such as dropping database tables. With a backup in place, everything mistakenly deleted can be quickly restored.
Drop Tables in phpMyAdmin
Dropping tables in the database permanently deletes the table and all the data stored there. Ensure that none of your applications or websites rely on the information you delete in the table(s).
-
Log in to your Bluehost Account Manager.
-
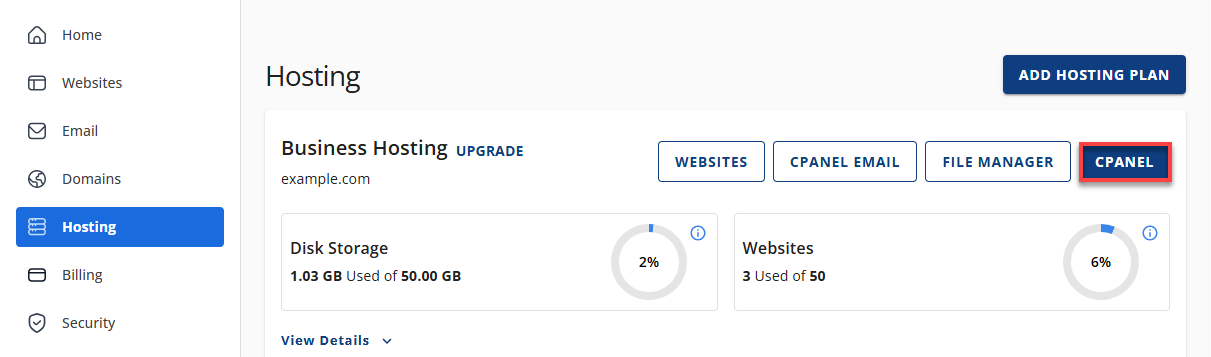
Click Hosting in the left-hand menu.
-
In the hosting details page, click the CPANEL button.
-
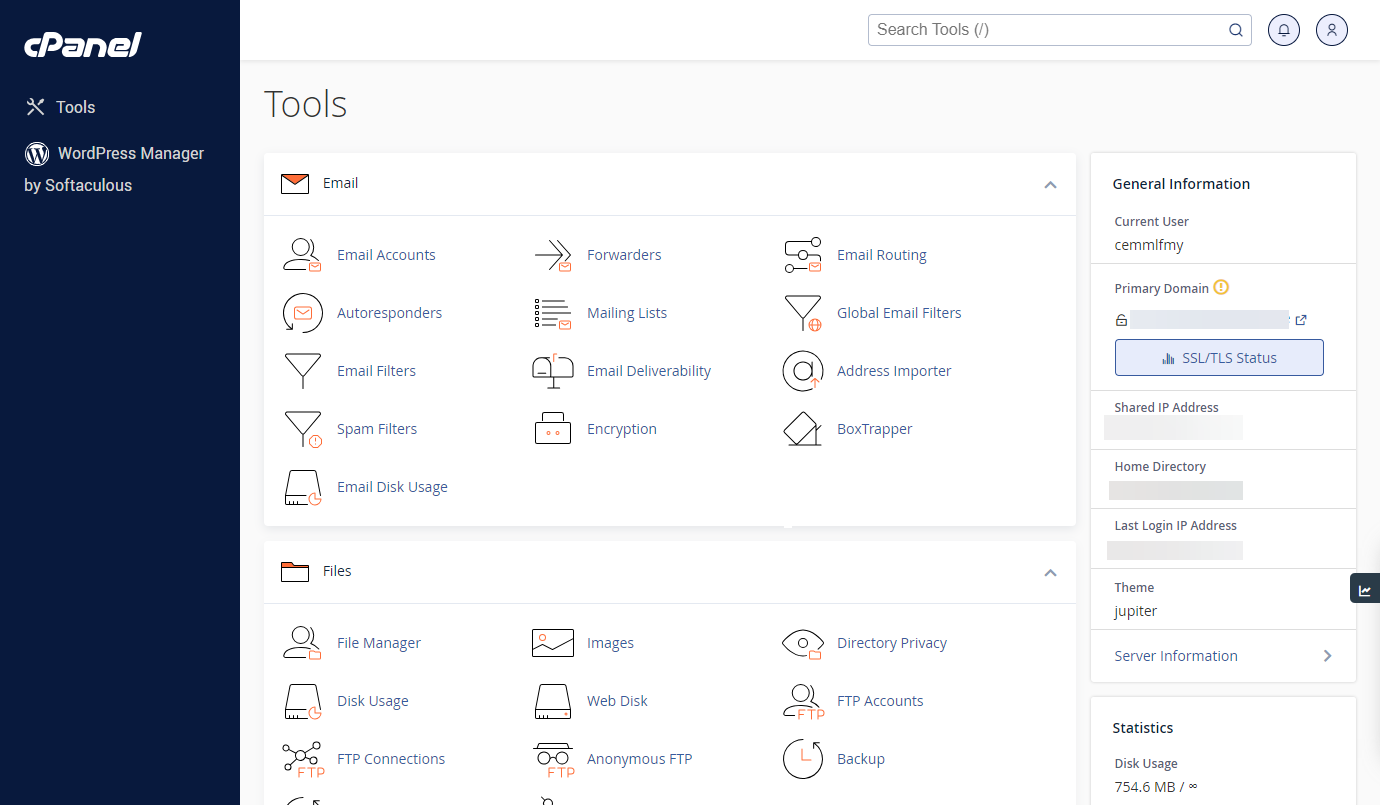
Your cPanel will open in a new tab.
-
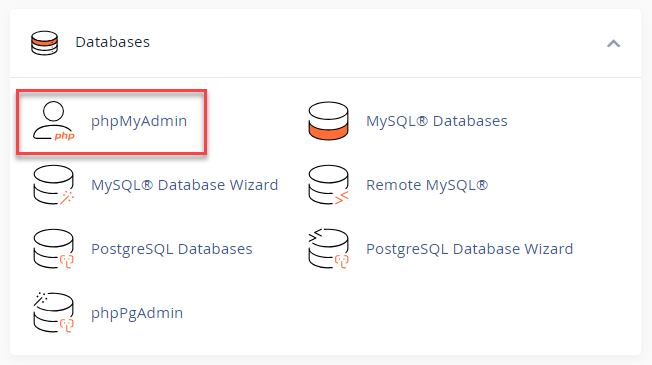
Under the Database section, select phpMyAdmin.
-
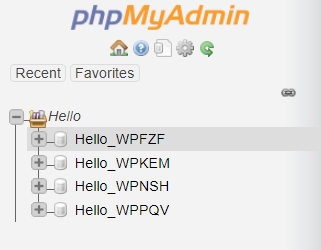
You can select the database you want to work with by clicking on its name in the left column of phpMyAdmin.
-
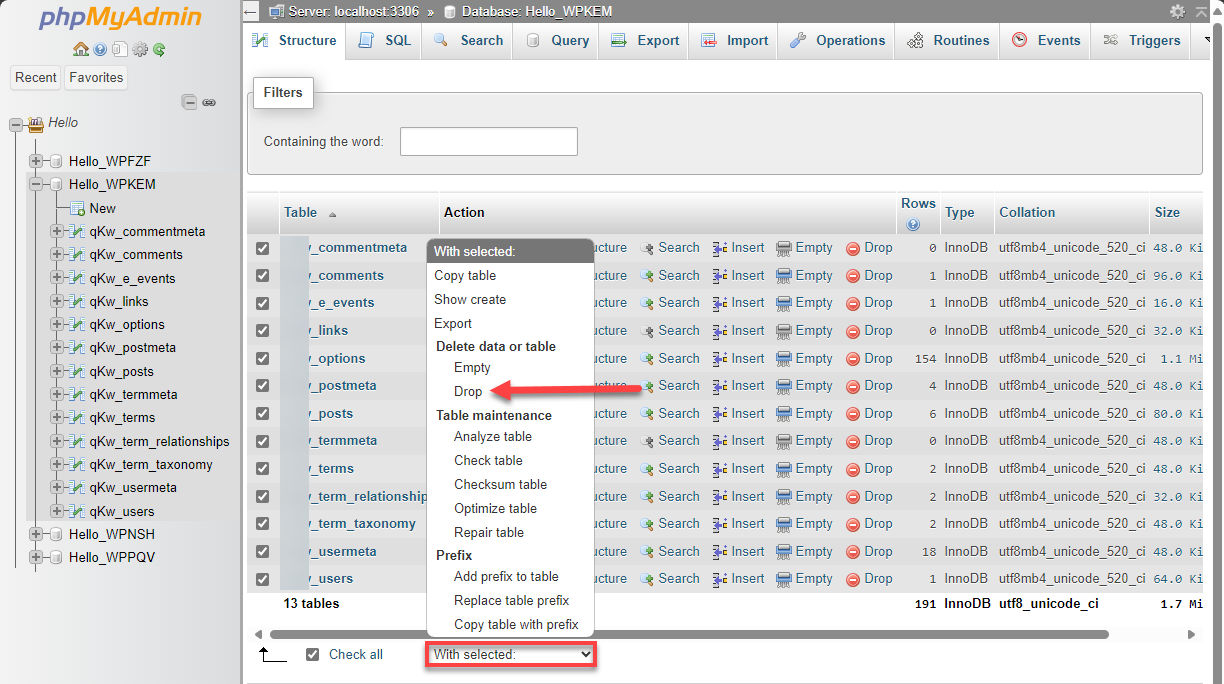
In the right column, you will see a list of tables. Check the table(s) you want to drop (permanently delete).
-
In the drop-down box that initially says "With selected: " select "Drop " from this list.
-
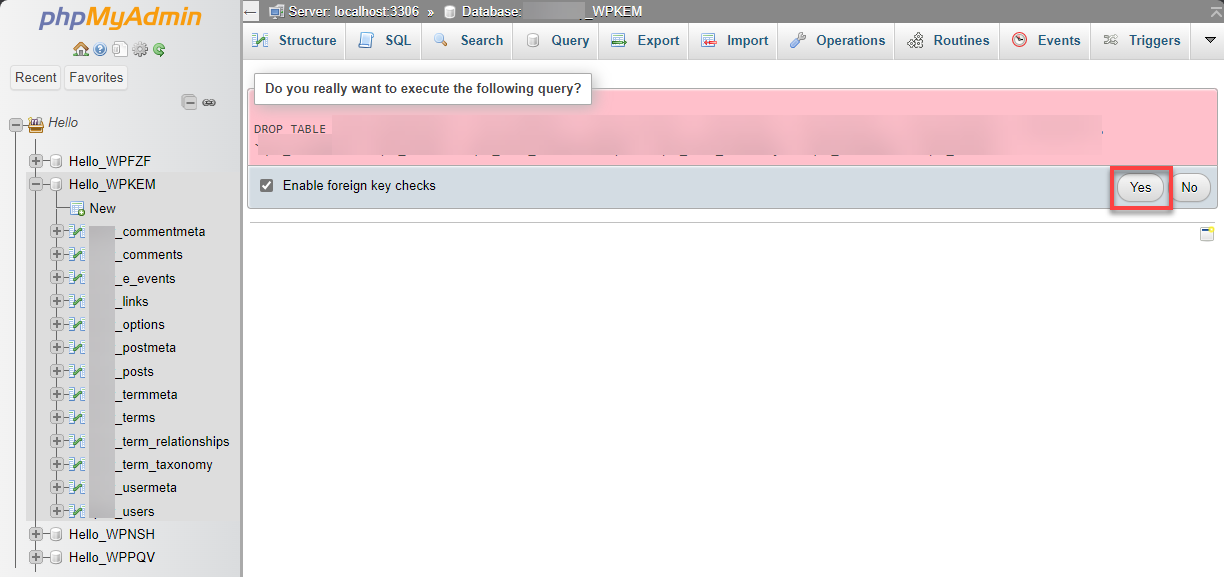
It will ask if you want to drop the table(s). Check to ensure you selected the tables you wish to delete.
-
Click on Yes to (delete) the database tables.
Now, the database tables have been dropped from the database, including everything that used to be in it.
Summary
Knowing how to drop tables in phpMyAdmin is valuable for managing your database effectively. Following the steps in this guide, you can delete tables in phpMyAdmin while safeguarding your data with proper backups.