How to Enable WordPress Debug Mode (WP Debugging)
Enabling WP Debugging is needed to troubleshoot the issues on your site. If you're experiencing errors or performance problems, learning to enable WordPress Debug can help you pinpoint the root cause. This article will guide you through enabling WordPress Debug by modifying the wp-config file, ensuring you have the tools to identify and resolve any issues. In this article, we'll discuss the following topics:
- Enable the WordPress Debug Mode
- Alternative Way to Access the File Manager
- Summary
Enable the WordPress Debug Mode
To enable WordPress debugging, follow these steps:
-
Log in to your Bluehost Account Manager.
-
In the left-hand menu, click Websites.
-
Click the MANAGE button located next to the website you want to manage.

-
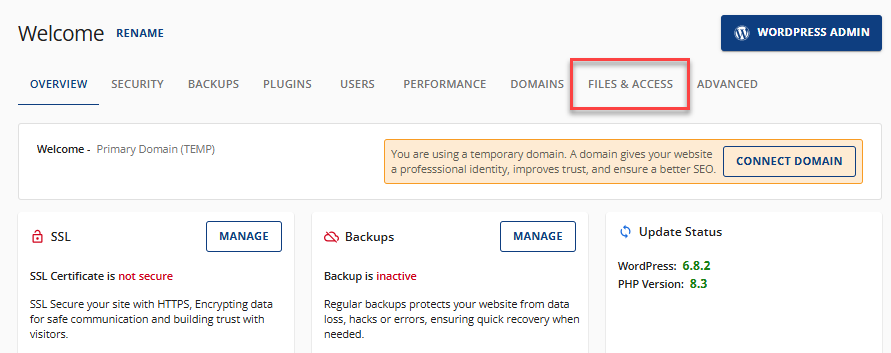
Click theFILES & ACCESS tab.
-
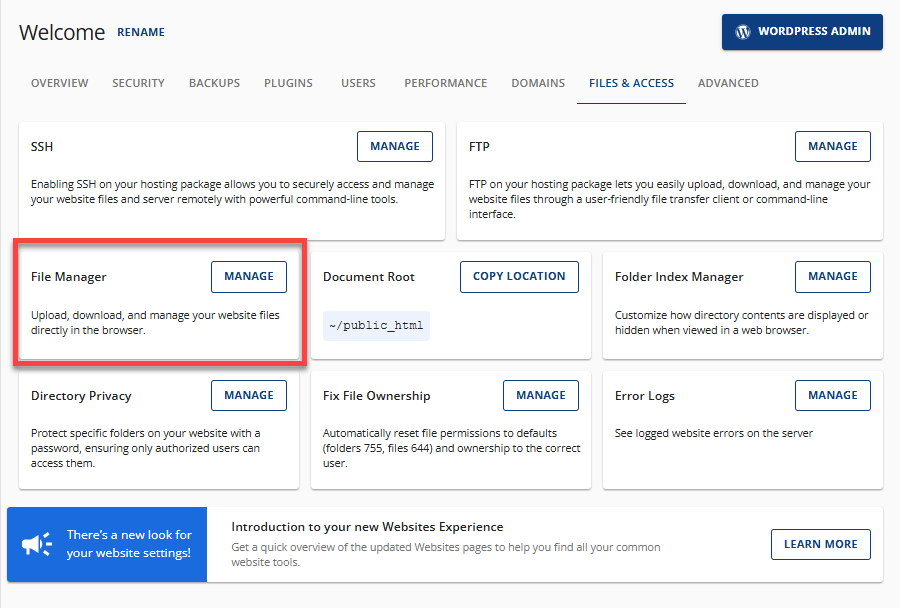
In the File Manager card, click the MANAGE button.
-
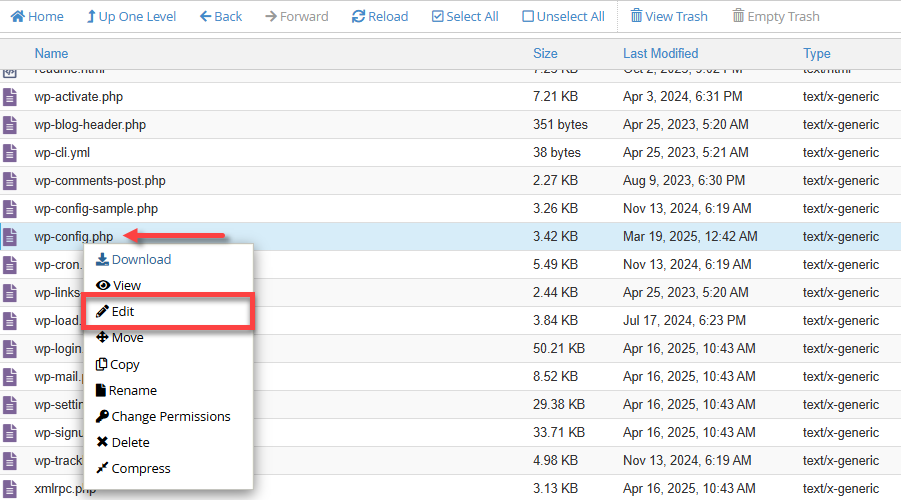
The File Manager will open a new tab. Select the wp-config.php file, right-click on it, and then click Edit.
-
In the pop-up window, click the Edit button again.
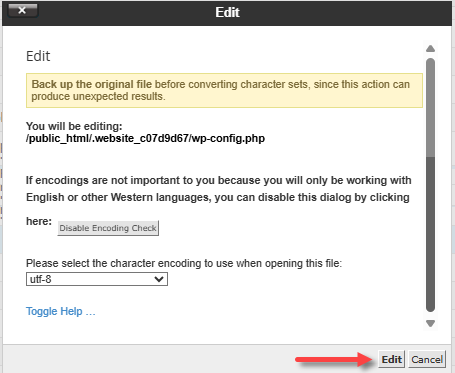 Depending on your File Manager settings, the "Character Encoding Verification" pop-up window may not appear.
 -
In your wp-config.php file, scroll down and look for a line with the 'WP_DEBUG ' code snippet. It is usually found before the line: ``` /* That's all, stop editing! Happy publishing. */

6. The default value of '**WP_DEBUG** ' is "false." Make sure to change it to "**true**."
define( 'WP_DEBUG', true );
7. You may also want to hide the errors on your live site. To do this, add the following code snippet:
define('WP_DEBUG_DISPLAY', false);
8. To save errors from your website in a file that you can easily access, enable the **WP_DEBUG_LOG** feature by adding the following code snippet to your wp-config.php file.
define('WP_DEBUG_LOG', true);
Make sure to place these code snippets before the line:
/* That's all, stop editing! Happy publishing. */
9. Click the **Save** **Changes** button in the top-right corner.

After identifying the error from the debug log, you can begin troubleshooting. Refer to the How to Troubleshoot Website Issues on Bluehost article for guidance. Once you've completed the troubleshooting process, make sure to change the **define ( 'WP_DEBUG')** from **true** to **false**.
define('WP_DEBUG', false)
## Alternative Way to Access the File Manager
Aside from accessing the Websites tab through the Account Manager, the File Manager can also be accessed using an FTP client.
Here are FTP-related articles to guide you.
* Create and Manage FTP Accounts for your Website - This will guide you in creating your FTP account through your Account Manager.
* FTP - General FTP Settings - This article will assist you in connecting to your Bluehost hosting server using FTP.

## Summary
Anyone who wants to properly troubleshoot their website must know how to enable the WordPress debug mode. WP debugging enables you to identify and fix errors that could disrupt the functionality of your website. Remember to update the wp-config.php file as outlined in this guide.