How to Set up Email on an Android Device
Knowing how to set up email on your Android device is a must in today's fast-paced digital world, so you can stay connected on the go. Whether you are using Gmail, Outlook, Yahoo, or another email application, correctly setting up your email settings can make all the difference in seamless communication. In this article, we'll walk you through setting up your email application on your Android device. Pro Tip: Before setting up your email on your Android device, check out our email plans — Professional Email and Google Workspace. You'll enjoy a domain-matching email address and robust tools and applications to help you run your business more efficiently while accessing your email from any device at any time. Here are the topics we will discuss in this article.
- Setting up an Email Account
- Summary
Here is a video guide we created to guide you through the steps.
Setting up an Email Account
While this article uses the Gmail app to demonstrate the setup process, the steps are generally similar for most email applications on Android devices. If you're using Outlook or another email app, you can still follow along—just look for the equivalent settings and options.
-
On your Android device, open the Gmail application.
-
Tap the menu icon in the top-left corner, then scroll down to Settings.
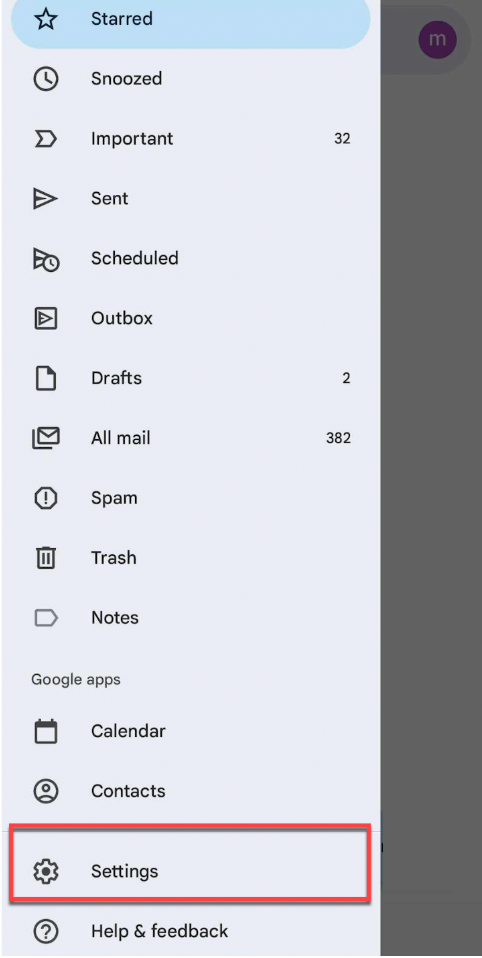
-
Tap Add account.
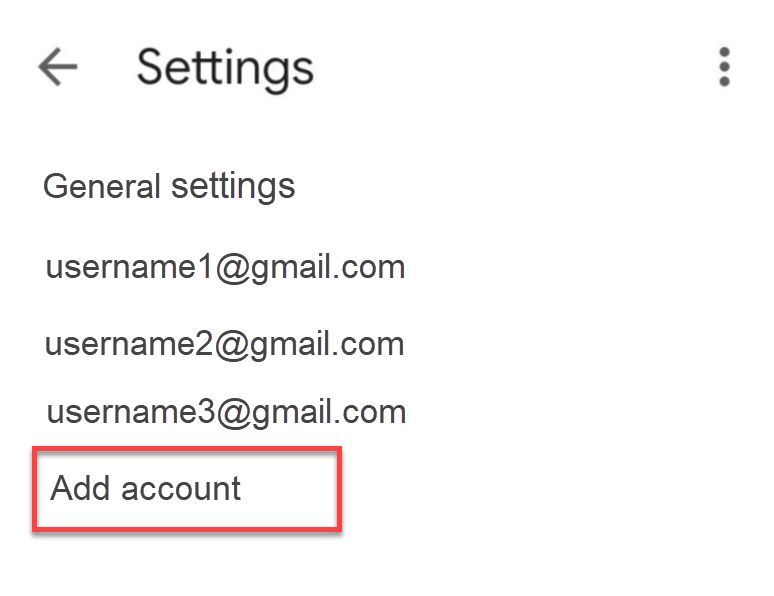
-
Select Other.
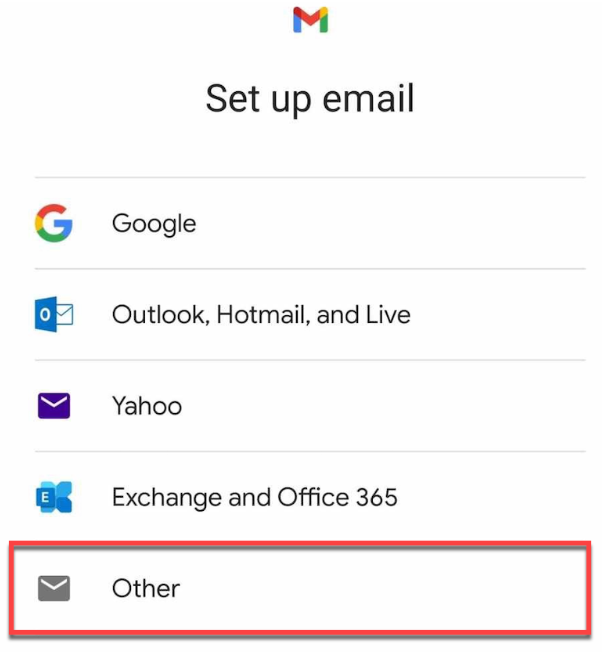
-
Enter your email address and tap the Next button.
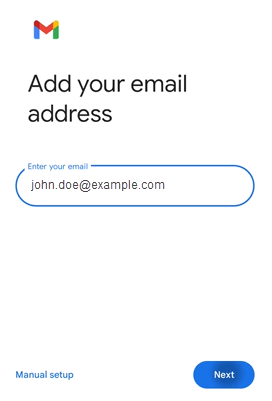
-
Select your email setup—POP3 or IMAP, then tap the Next button.
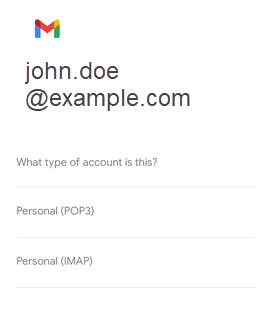
- POP3 will download the emails from the server and store them on your phone.
- IMAP will store the emails on the server and show a cached copy on your phone. IMAP is best for most cases.
-
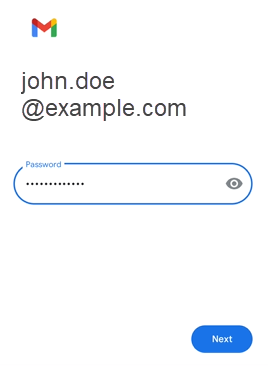
Enter your email password, then tap Next.
-
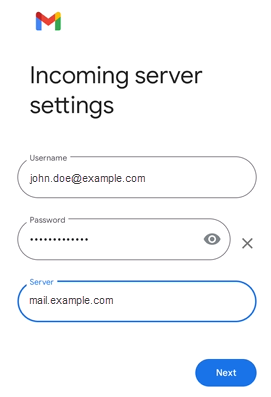
In the Incoming server settings , enter your incoming mail server. That's going to be your domain name preceded by "mail." (For example: "mail.example.com ")
-
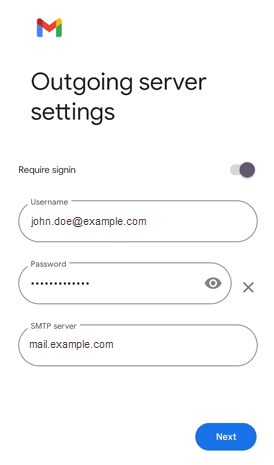
In the Outgoing server settings , enter your outgoing mail server, which is the same as your incoming mail server. Tap Next.
-
For the Account options , select your preferred settings. This sets how often you want your device to check for new emails. Click Next.
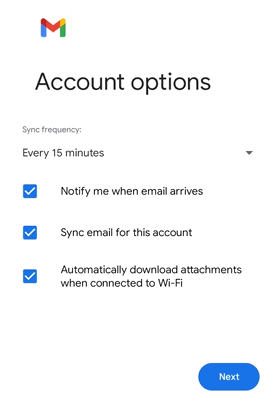
- Notify me when email arrives : Select if you would like to be notified of new emails.
- Sync email from this account : Select if you want the email to be checked automatically Tap Next.
-
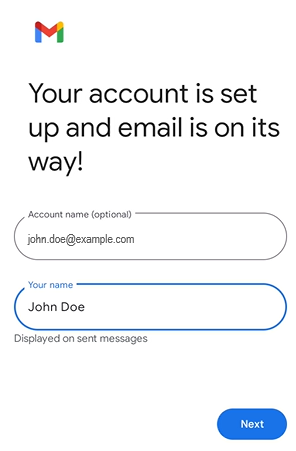
Your email account is now set up. Please enter the name you would like to display in the emails you send. Tap Next.
-
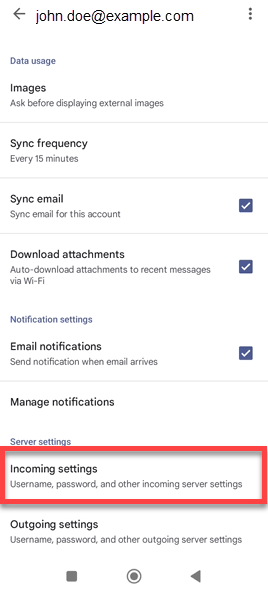
Under Settings , tap your email address.

-
Scroll down to Server settings , then tap on Incoming settings.
-
In the Sync options pop-up, check to ensure the settings are correct.
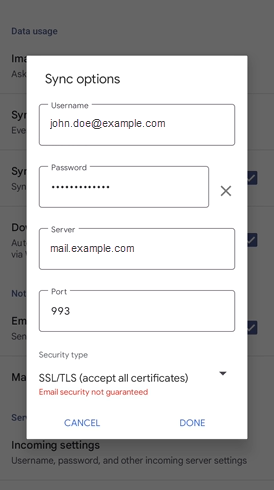
- IMAP Port: 993 (Secure) | 143 (Insecure)
- POP3 Port: 995 (Secure) | 110 (Insecure)
Please note we recommend using the secure IMAP/POP3 ports. - Server: mail.yourdomain.com (Your server is your domain name preceded by "mail. "). Tap on Done.
-
Next, tap on Outgoing settings.
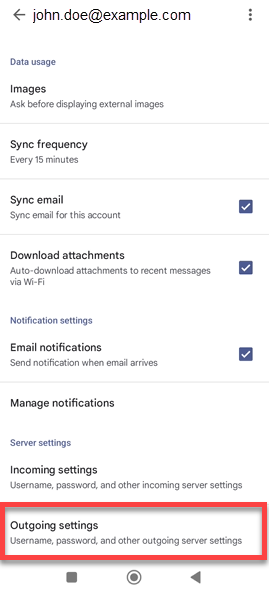
-
In the pop-up, check to ensure the settings are correct.
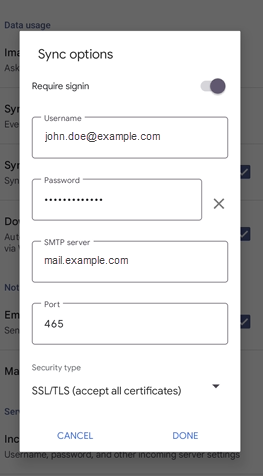
- SMTP Port: 465 (Secure) | 26 (Insecure)
Please note we recommend using the secured SMTP port. - Server: mail.yourdomain.com (Your server is your domain name preceded by "mail. ") Tap on Done.
- Navigate back to Settings , then to your Inbox. Refresh to view your email messages.
Summary
This article provides a step-by-step guide on how to set up email on an Android device. While we used Gmail as the email application in this article, the steps listed are relatively similar to that of other email apps. Setting up email on your Android device is a great way to keep up with your email while on the go. It covers everything you need to know about setting up email on the Gmail app for Android Phone/Tablet, Incoming Mail Server, Outgoing Mail Server, and Account Options. You may also want to check Bluehost's Professional Email or Google Workspace. Let Bluehost build your credibility and take your brand to the next level with an email plan that fits your team's needs and budget.