How to Set Up Outlook 2011 on macOS
Setting up your email in Outlook 2011 on macOS is critical for keeping your communications professional and structured. If you're still fighting with outdated or clumsy installations, it could send the wrong message to your connections. A smooth, dependable email setup keeps you connected and reinforces your professionalism every time you click "send." Let's get started with the steps below!
- Create a New Email Account
- Enable SMTP Authentication
- Summary
Create a New Email Account
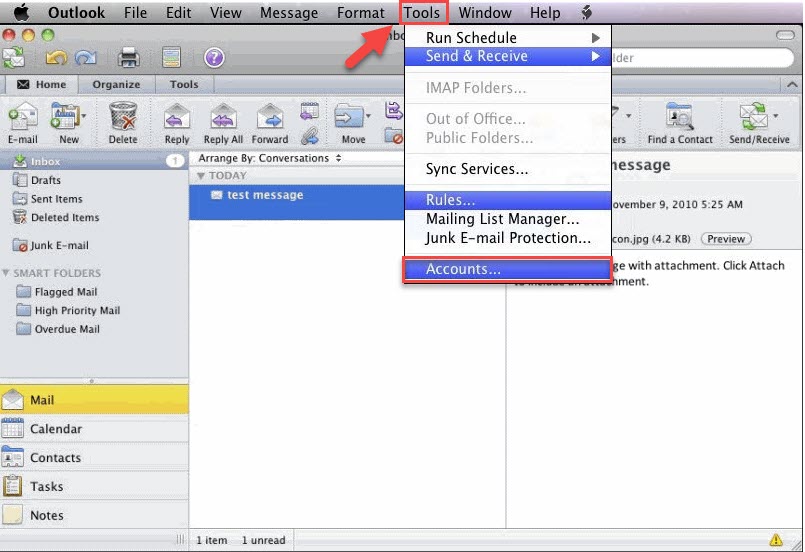
- Open the Tools menu and choose Accounts.
- Click on E-mail Account.
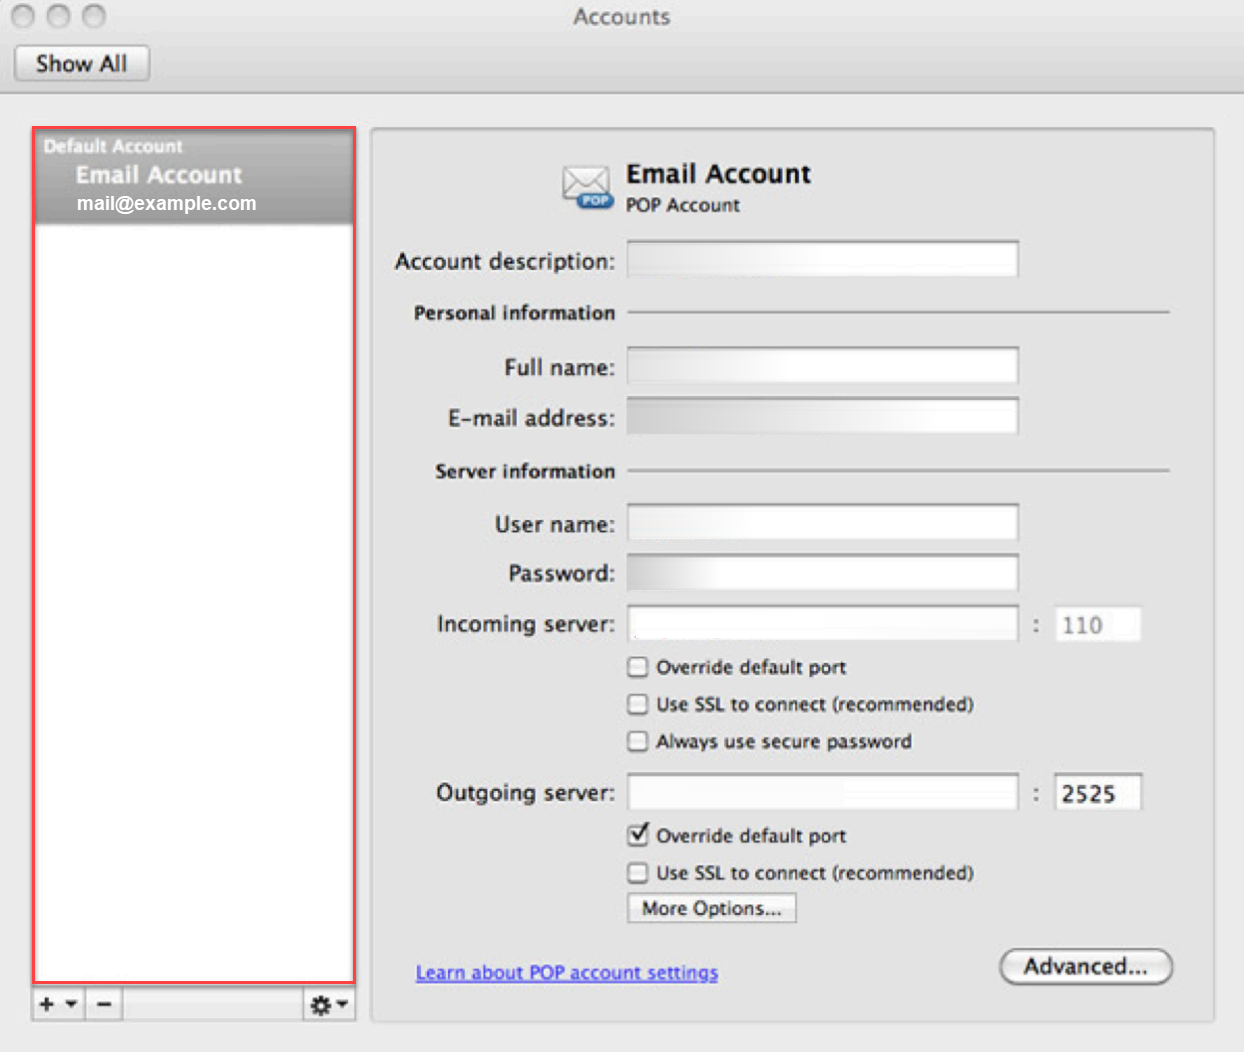
- Enter yourE-mail address: Your full email address.
- Enter yourPassword: The full case- and character-sensitive password for this email account.
- Enter your accountUser Name : Your full email address again.
- Incoming server : This is typically your domain name preceded by "mail.", e.g., mail.example.com
- Outgoing Server : This is the same as the Incoming server.
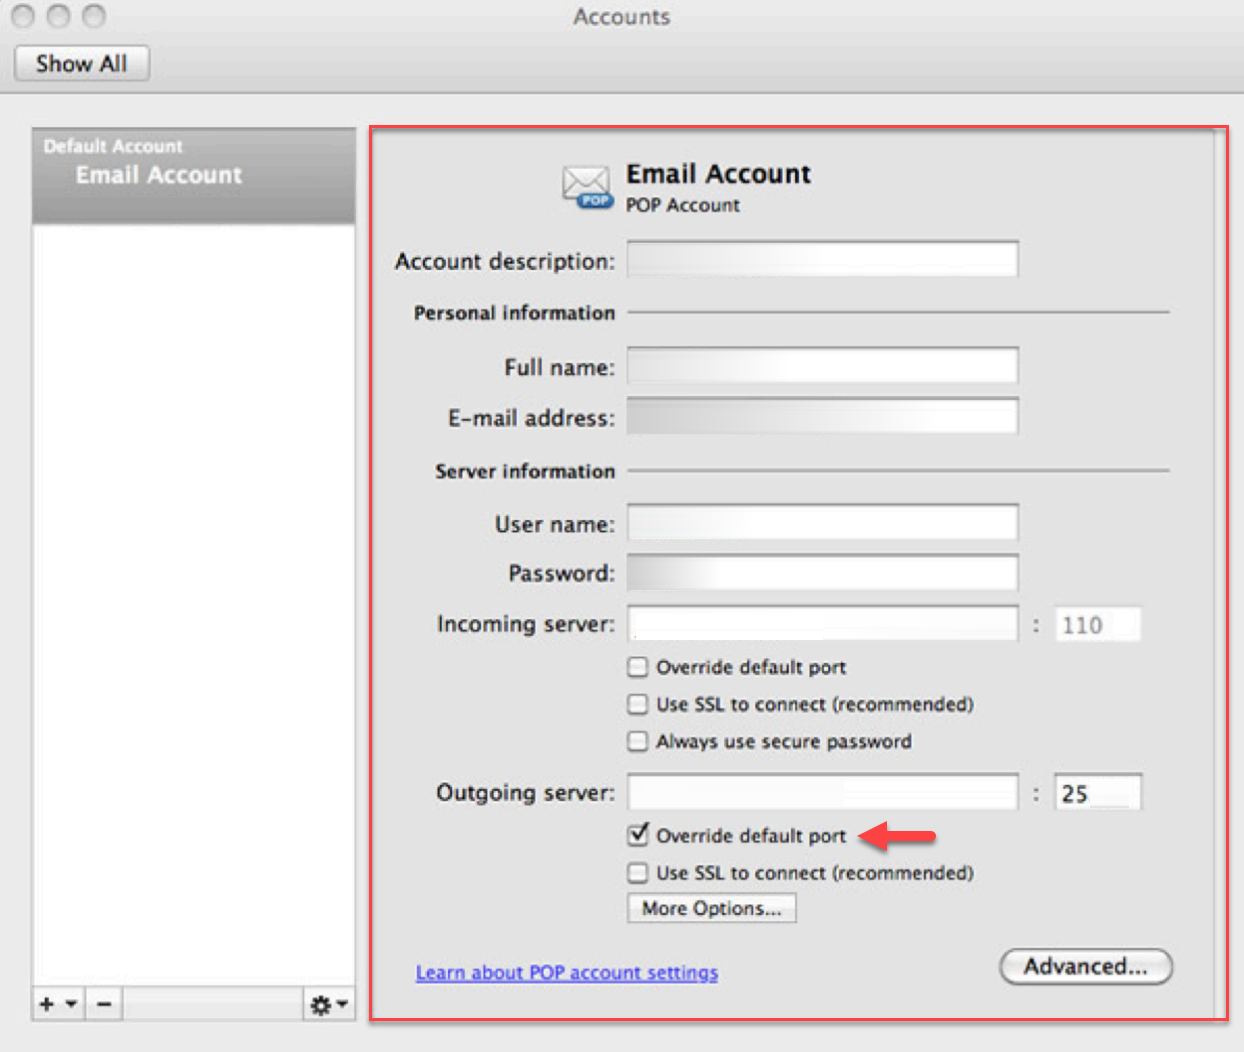
Tip: You may need to check the box to "Override default port" and use port 26 instead of the default port 25.
- Click the Add Account.
Enable SMTP Authentication
Now that you've set up the email account, you need to enable SMTP Authentication.
- Open the Tools menu.
- Select the Accounts...
- Click the E-mail Account.
- Click the More Options... button.
- From the Authentication drop-down menu, choose Use Incoming Server Info.
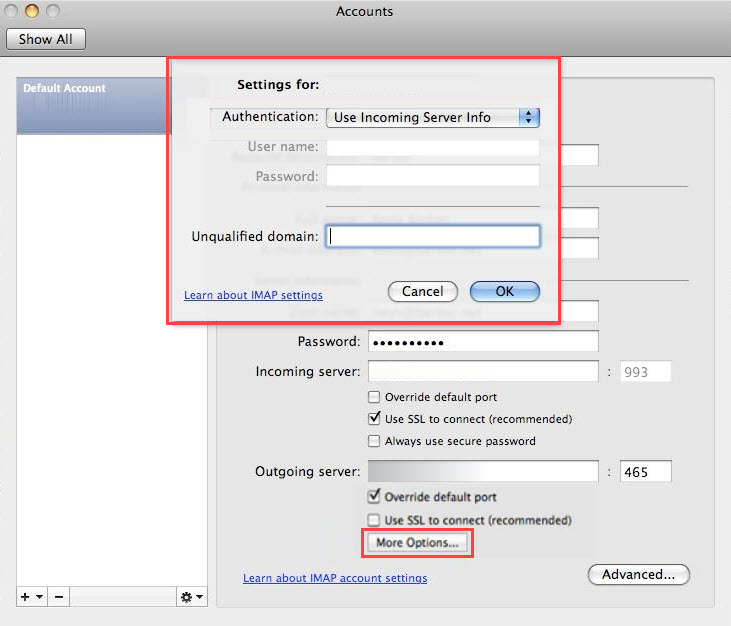
- Click Ok.
Great job! You're all set! Outlook 2011 is now successfully configured to send and receive emails on your macOS.
Summary
Outlook 2011 for macOS is easy to set up and improves email correspondence. By setting up your email account and turning on SMTP authentication, you can guarantee safe and effective email management. Outlook 2011 has many features that help you be more productive and streamline your email experience. Our knowledge-based articles offer practical advice on various email-related subjects to help you setup if you have problems or need more help.