VPS & Dedicated Hosting: Modifying the Exim Ports
Modifying the Exim ports on the VPS or Dedicated servers by yourself at Bluehost ensures reliable email delivery by addressing the issue of ISPs blocking their preferred port, with 25 being the most popular port among them. This guide provides a step-by-step process to change the Port Process that will help your mail receive a smooth conveyance by shifting all that traffic to Alternate ports using port 26. Many ISPs (Internet Service Providers) block port 25. So, it is useful to have an alternate port available to use. Port 26 is open on all of Bluehost's shared servers, so you may already have it configured by default. Otherwise, to open an additional port, or if you want to change the port:
-
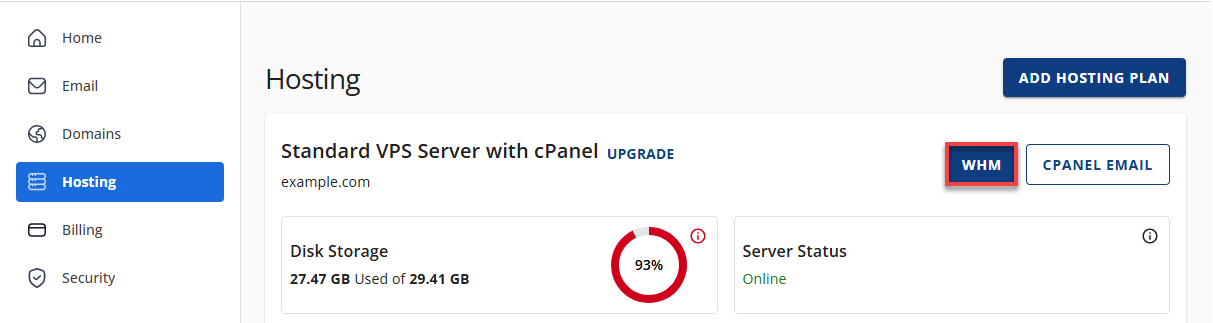
Log in to your Bluehost Account Manager.
-
Click Hosting in the left-hand menu.
-
In the hosting details page, click the WHM button.
-
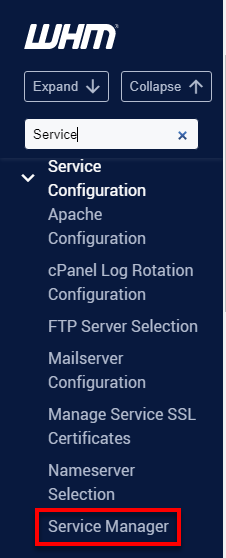
Look for the Service Configuration. The quickest way is to type the keyword in the search box on the left-side panel.
-
Click on Service Manager from the search results.
-
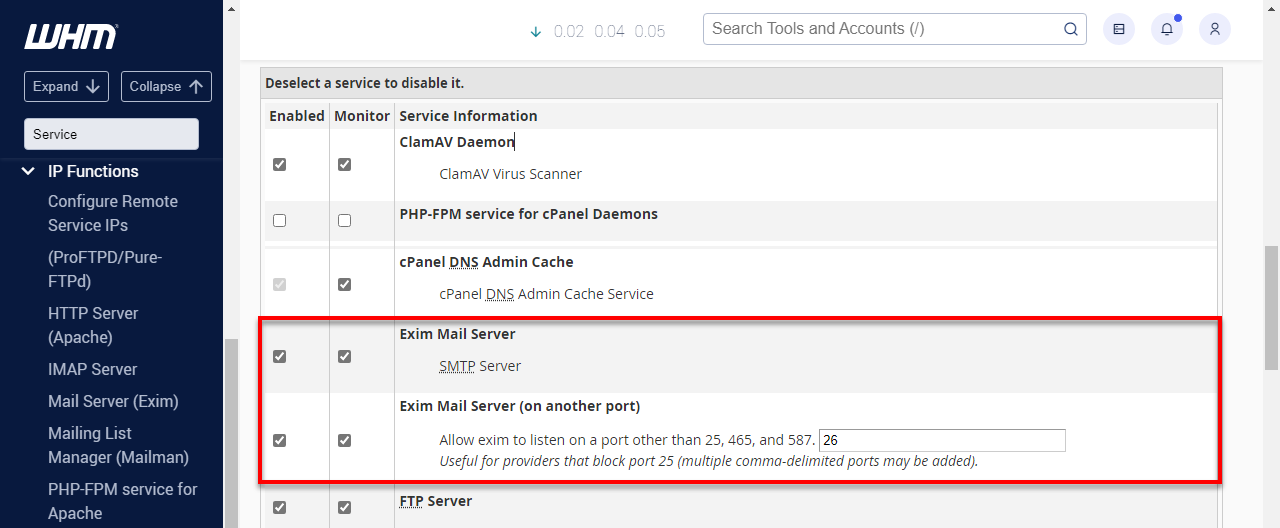
From the Service Information, enable both Exim Mail Server and Exim Mail Server (on another port).
-
Click Save.
Summary
Changing the Exim port in your VPS or Dedicated server is a relatively simple task, but it has profoundly positive effects on your email delivery. Following these instructions and changing the settings of the port, then working through to apply the change on the target server, goes around possible ISP interference and ensures that your emails keep going back and forth with you without any hassle.