OX Email - How to Create a Mailbox Using External Domain Name
Bluehost's Account Manager has a new email service that allows you to manage your email service with us. In this article, we will guide you through the step-by-step process of creating a mailbox using your email plan, even if your domain name is registered with another company.
Note : These instructions are for the Account Manager interface; if you need help determining your account's user interface, please check out our article, New vs Old View Side-by-Side Comparison, to learn more.
- Log in to your Bluehost Account Manager.
- On the left side of the page, select Email.

- Click Assign Mailbox.

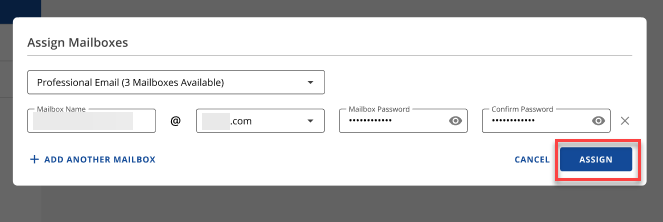
- The Assign Mailboxes will pop up, and click on the drop-down to select the plan you prefer.

- Enter the necessary details such as Mailbox Name, Domain Name, Mailbox Password, and Confirm Password Field. Once you're done, click Assign.
- Once you're done, you'll see the confirmation pop-up showing it has been successfully added.
 Important: After creating your mailbox, you must obtain the DNS settings and change them with your current registrar.
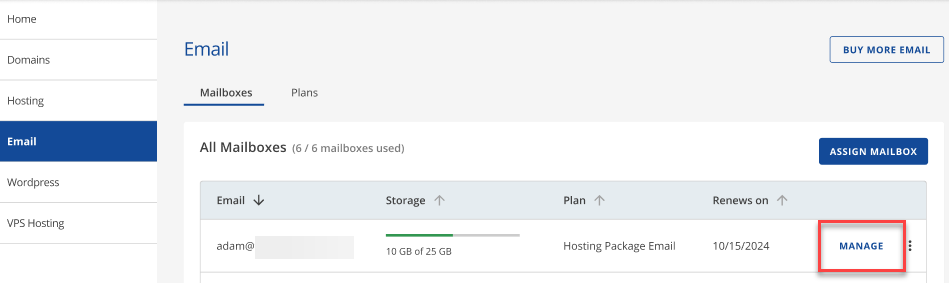
 - Click Email on the website's left side to get back to the service details page.
- Find the newly created mailbox and select it by clicking the Manage option.
 Note : When DNS records are added or updated to your registrar, Changes to your DNS will take 24 - 48 hours to update throughout the internet; this period is called propagation. To learn more, you can check out our article DNS Propagation.