Exploring the OX Mail Address Book Components
Understanding the OX Mail Address Book
Your email Address Book in OX Mail is a powerful tool that organizes your contacts and facilitates seamless communication. Whether it's personal, shared, or public address books, OX Mail provides a comprehensive solution. This article will guide you through the essential components of the OX Mail Address Book, helping you make the most out of its features.
- This article ONLY applies to those whose accounts have been migrated to the Account Manager experience. Please see the New vs Old View Side-by-Side Comparison article to learn more.
- To access the user guide in your web browser, click the
 icon and select the Help option. By default, it will direct you to the Help section relevant to your current category. Explore additional articles by navigating to the Table of Contents. To perform a search within the user guide, press CTRL+F on your keyboard simultaneously.
Click the topics below to learn about the Address Book components and how to use them:
Accessing OX Mail's Address Book
To access your OX Mail Address Book, please follow the steps below.
- Open your internet browser.
- In the address bar, enter https://webmail.oxcs.bluehost.com/.
- Log in to your email.
- Enter your email address.
- Input your password associated with the email address you want to log in to.
- Click the Sign in button.
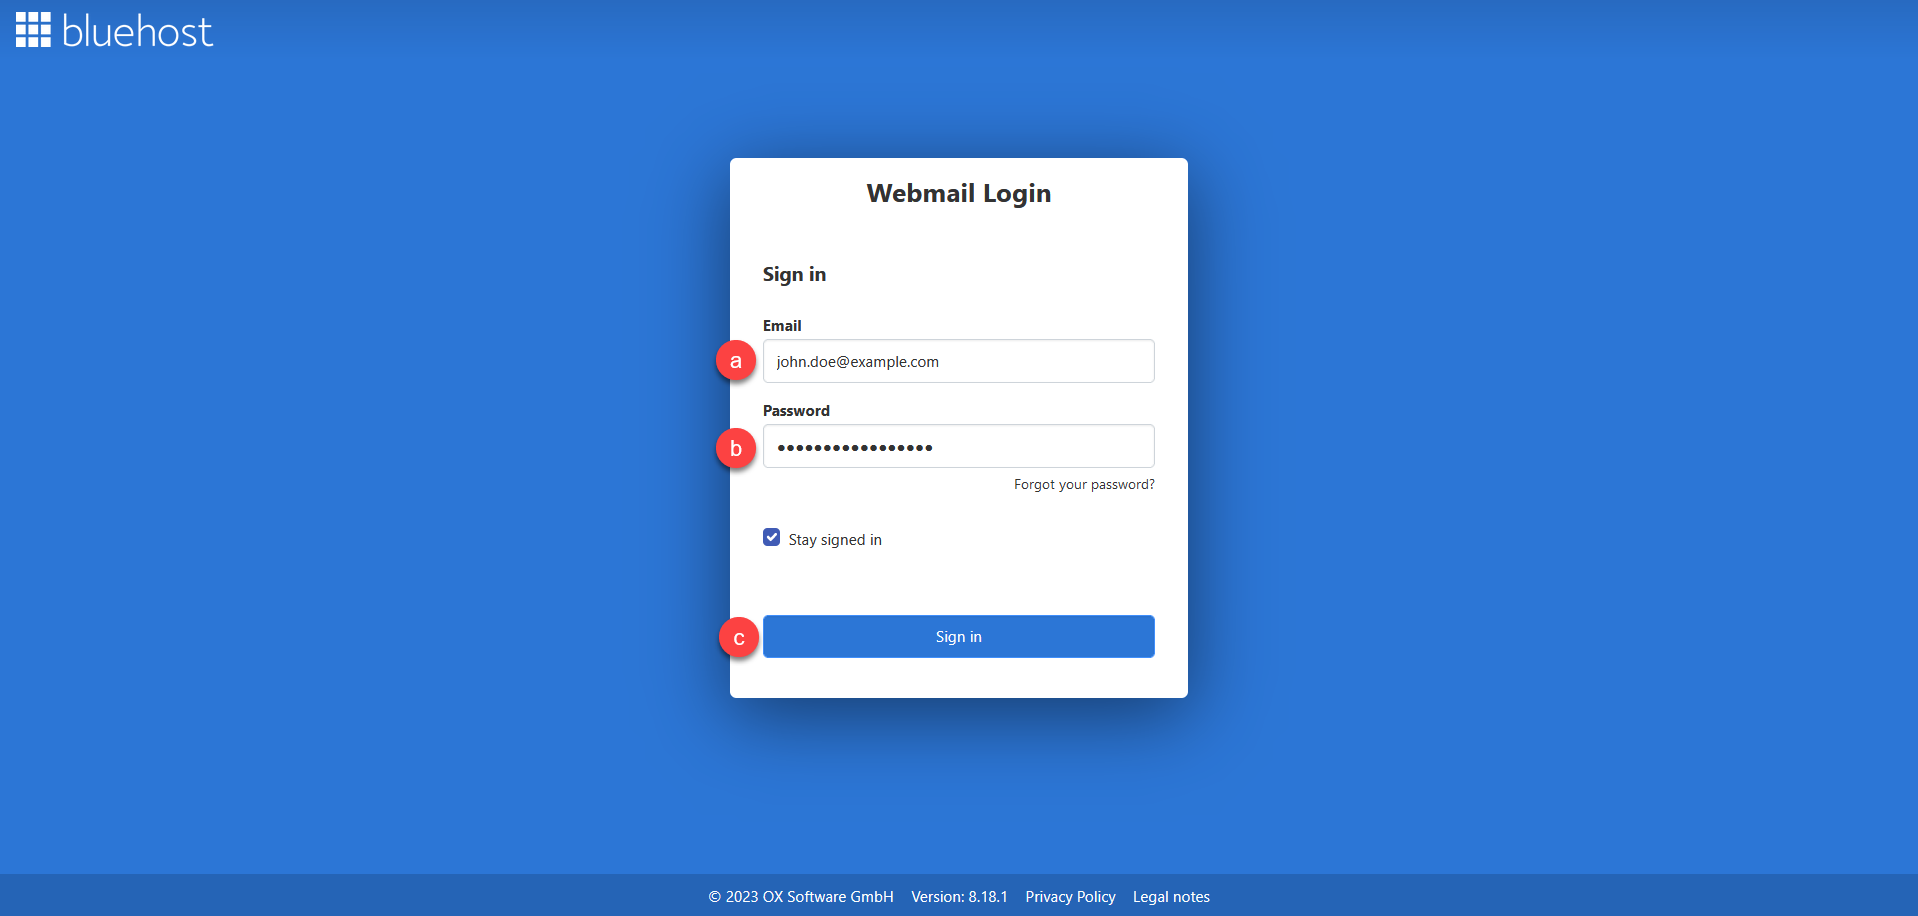
Enable the Stay signed in option by ticking the box to ensure your session remains active, preventing automatic logouts and the need to log in repeatedly. 4. Once logged in, you can follow either of the steps below:
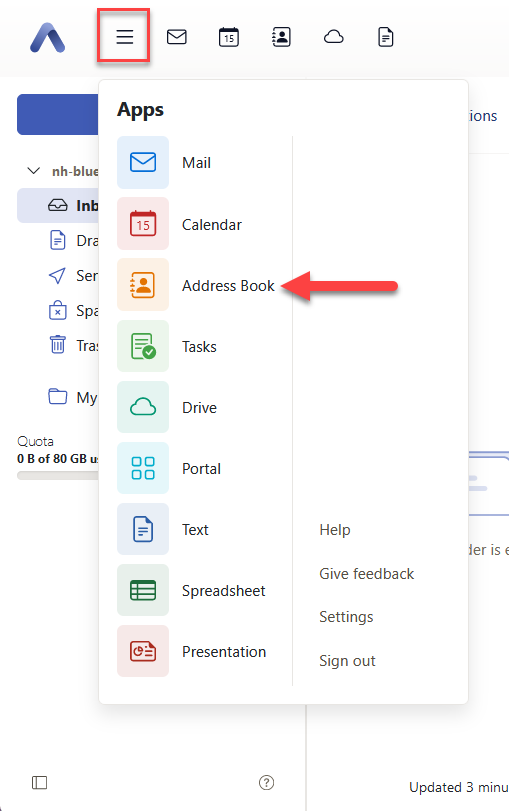
- Go to the upper-left corner of your OX Mail home dashboard and click the Address Book icon.

OR
- Click the ☰ (hamburger menu) icon beside the big
 icon, then click the Address Book app among the drop-down options, as shown in the screenshot below.
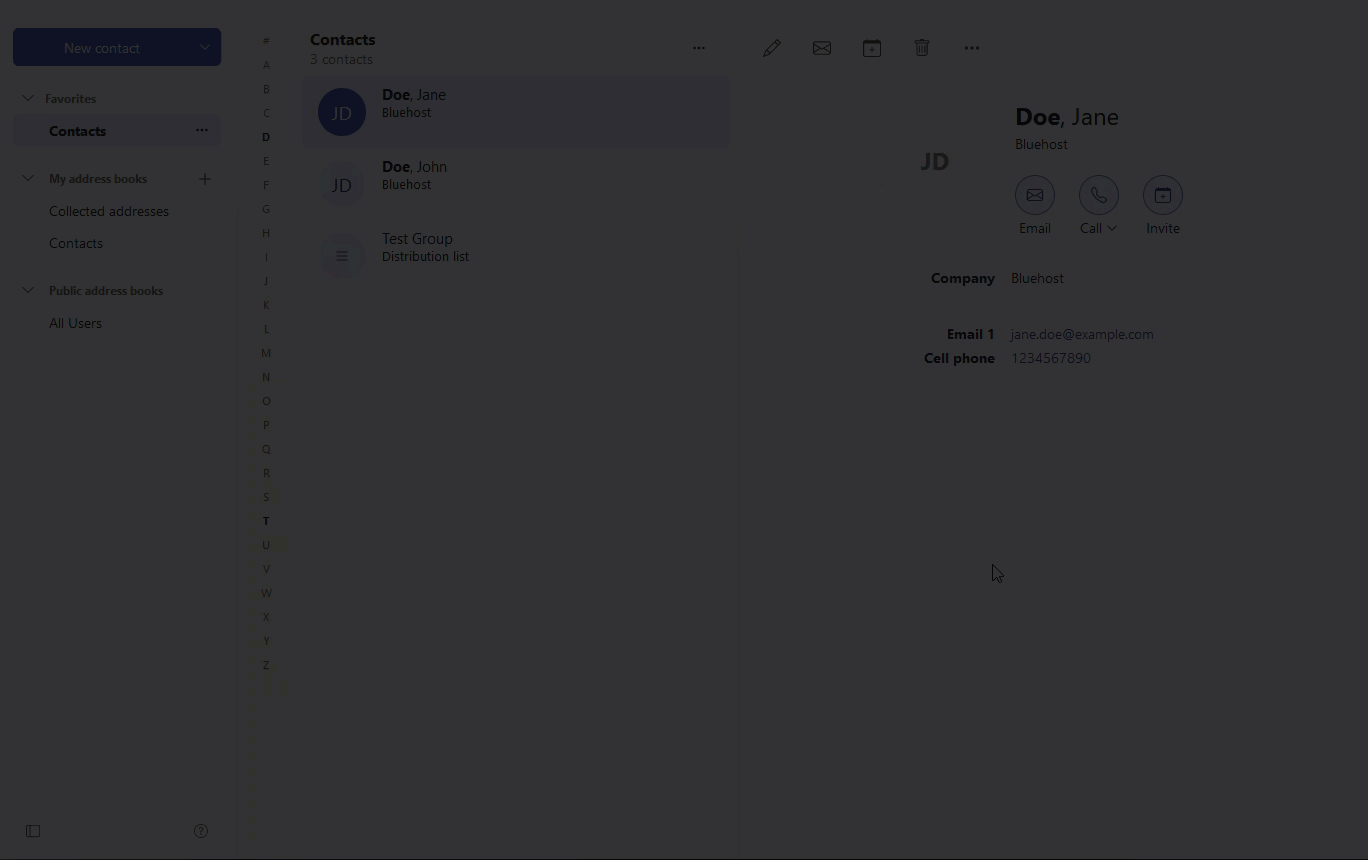
Address Book Toolbar
The Address Book Toolbar is your command center for managing contacts efficiently. With functions such as creating, editing, and organizing contacts, this section empowers you to streamline your communication.
-
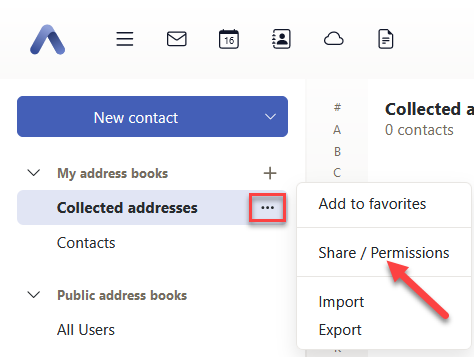
Certain features are accessible based on the permissions of a particular address book. To review and modify permissions, click on the Actions
 button (represented by horizontal ellipses) next to a specific address book and choose Share/Permissions.
-
Specific functions become visible only when the chosen contact(s) possess an email address.
Toolbar Content
The image below shows the Toolbar contents.
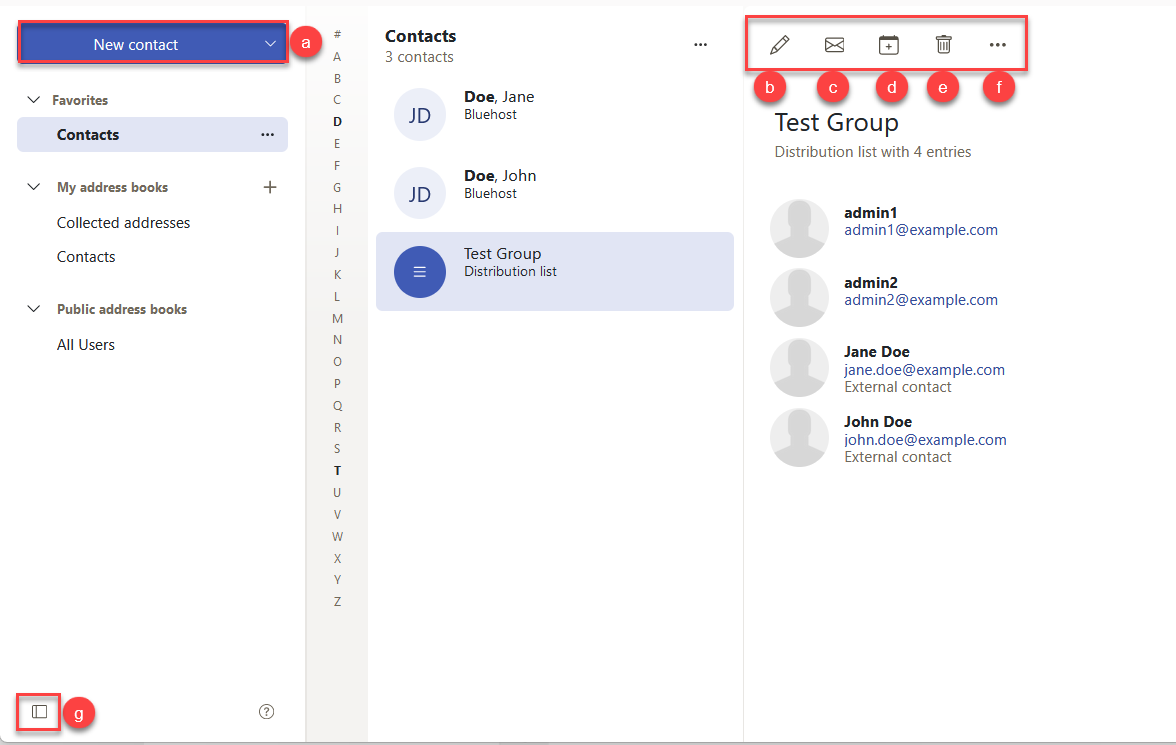
- New Contact Button: Create a new contact effortlessly. Please be aware that clicking on the drop-down arrow adjacent to the New Contact button provides options to generate a new distribution list, email, appointment, or task. Additionally, it enables you to subscribe to either an address book or a shared address book.
- Edit: Modify contact details as needed.
- Send Email: Send emails directly to selected contacts.
- Invite to Appointment: Schedule appointments with your contacts.
- Delete: Remove unwanted contacts from your list.
- More Actions Icon: Access additional functions based on your address book's permissions. Please be aware that the arrangement of certain functions might vary based on the address book or contact data. Additionally, these functions may not be accessible if you lack the requisite permissions.
- Folder View Icon: Toggle the display of the Folder view.
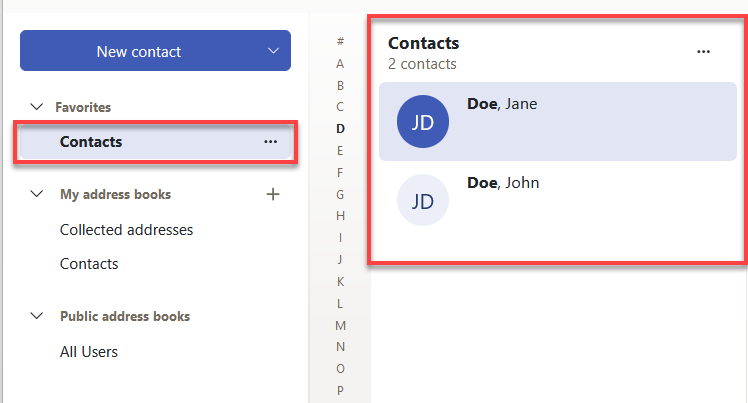
Address Book Folder View
Effortlessly navigate through your address books using the Folder view, which categorizes your contacts into Favorites, My Address Books, Public Address Books, and Shared Address Books.

Folder View Content
- Favorites: Your selected favorite address books.
- My Address Books: Your personal address books.
- Public Address Books: These are address books shared with all users.
- Shared Address Books: Address books shared with you by other users. The availability of shared address books and public address books depends on the configuration.
Folder View Functions
- Click on an address book to view its contacts.
- Utilize the Actions button (represented by horizontal ellipses) next to an address book for organizing and exchanging data.
- Add new personal address books with the Add new address book
 button.
 - Adjust the width by dragging the border between the folder view and the display area.
Address Book Navigation Bar
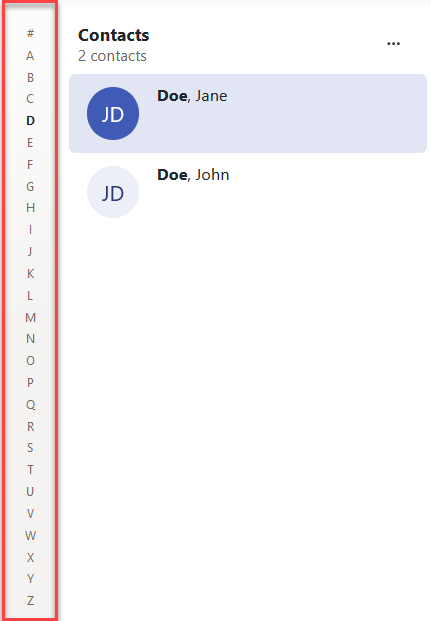
The Navigation Bar, which is arranged alphabetically, provides a quick way to access contacts with a specific initial letter.
Address Book Display Area
This area presents a list of contacts from your selected address book and detailed information about a specific contact.
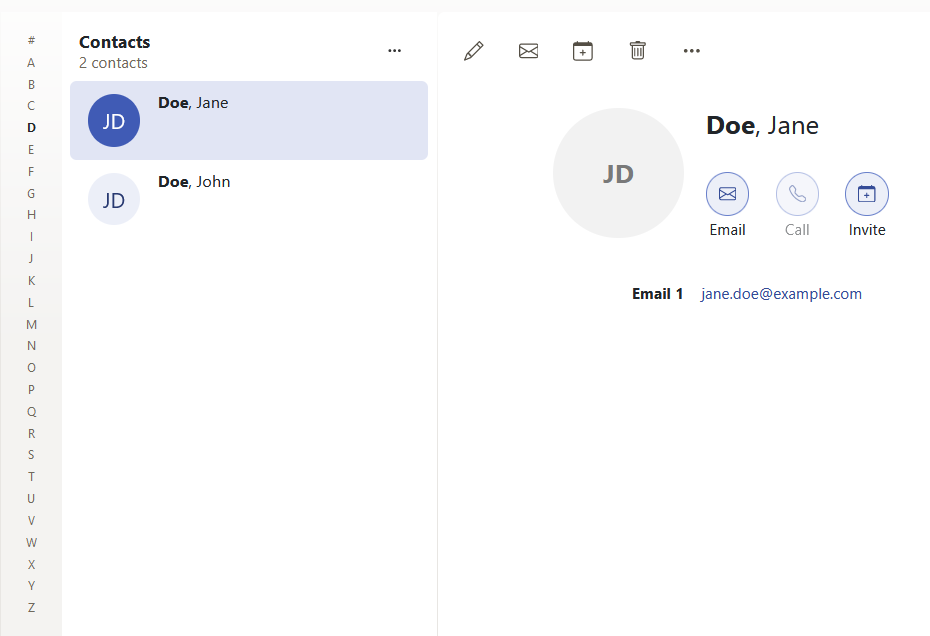
Address Book List
The list offers a detailed view of contacts within a selected address book, providing information such as names, companies, and contact numbers. For example:
List Content
- Each contact will show the following information:
- Name
- Company
- The text positioned above your contact list represents the name of the selected address book, and the number beneath it indicates the total contacts within that address book.
- Contacts whose names commence with a special character or symbol will appear upon clicking the # in the navigation bar.
List Functions
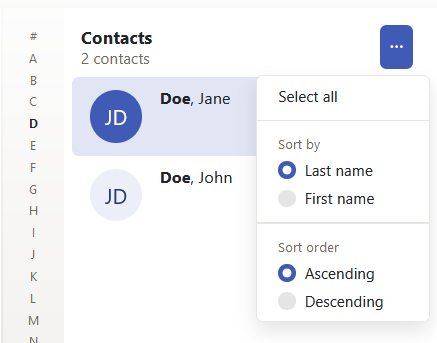
- To choose all contacts in the list, click the Actions button (represented by horizontal ellipses) next to the address book name and click Select All.
- You can arrange your contacts by using the Actions button (represented by horizontal ellipses) and choosing from the following options:
- Last name
- First name
- Ascending Order
- Descending Order
- Selecting a contact will exhibit its details in the right-hand detail view.
- Adjusting the width between the list and detail view is achievable by hovering over the line and dragging the border to the right or left.
Address Book Detail View
The Detail View offers a closer look at the selected contact, displaying essential information like pictures, names, and contact details.
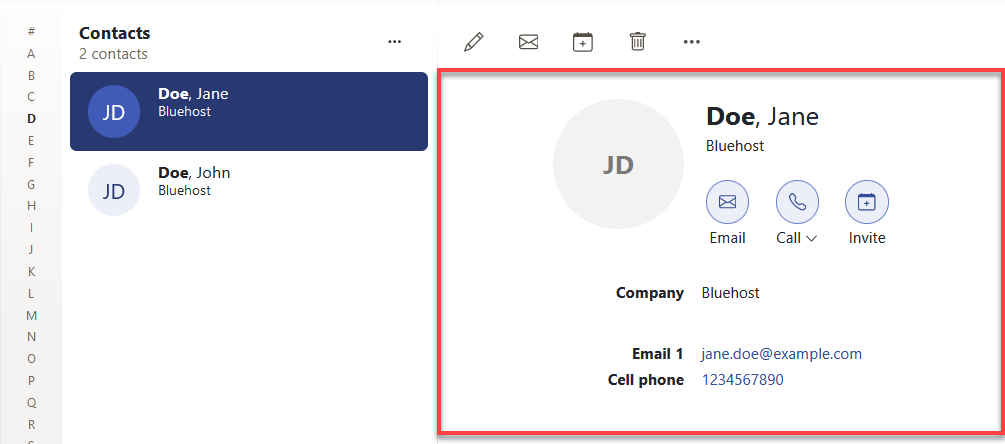
Please be aware that the amount of information presented may differ. Detail View Content The detailed view will display the following:
- The contact's image, name, company, and department
- Email address - opens a page for composing an email upon clicking.
- Business and private phone numbers
- Business and private addresses
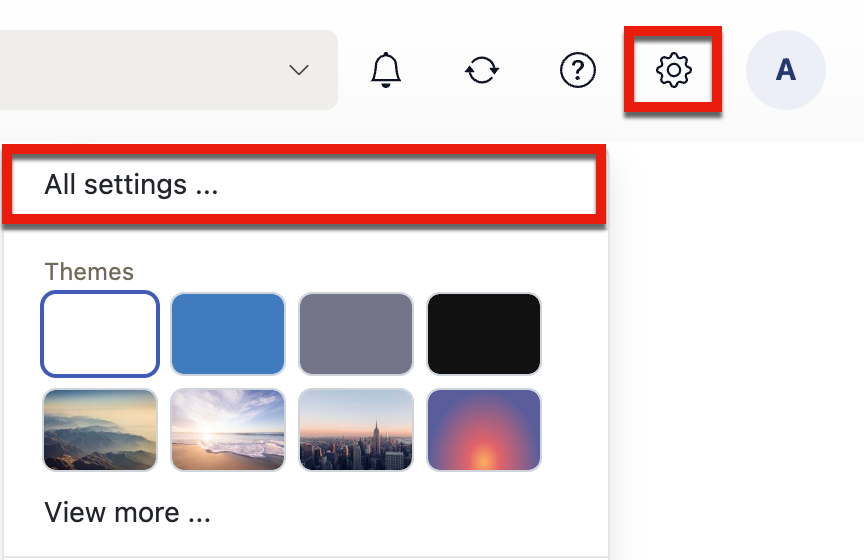
- You can specify whether to use a map service when clicking on an address in the detailed view.
- To configure the map service, follow the steps below:
-
Launch the Settings pop-up.
-
Click the Settings (gear) icon.
-
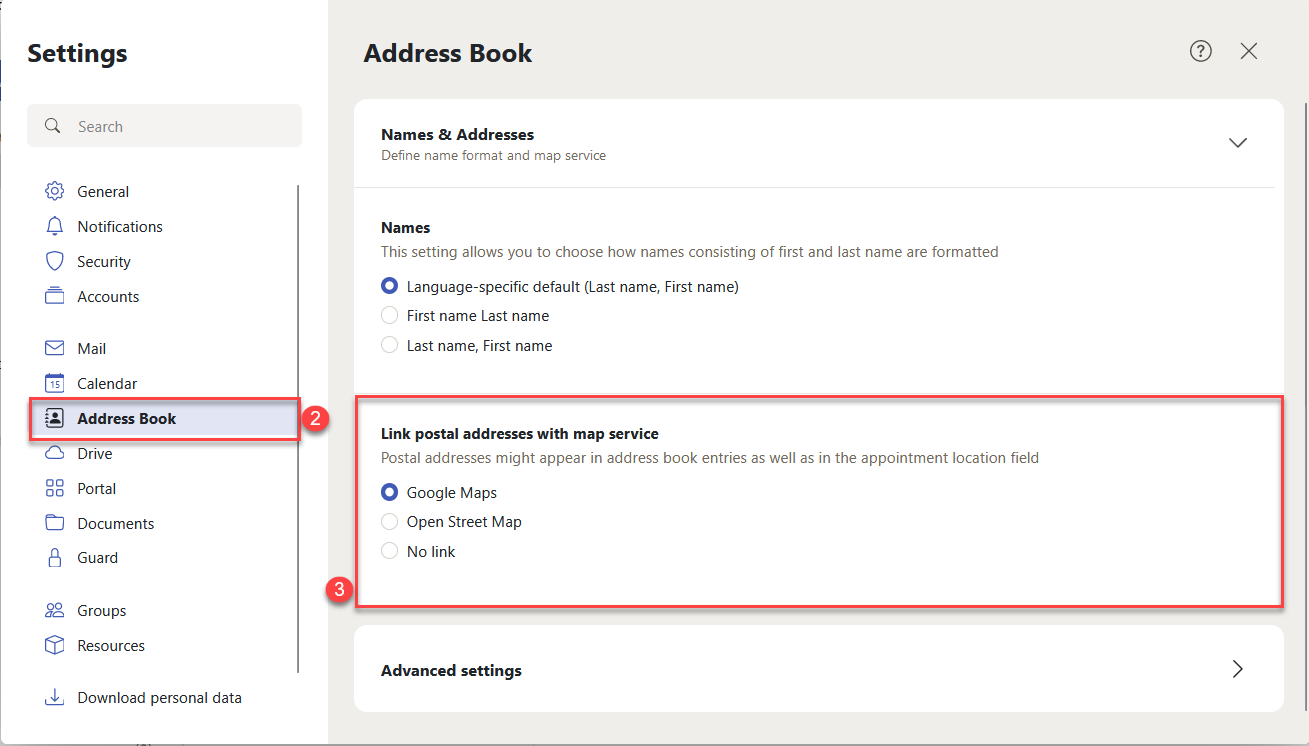
Click the All Settings... drop-down option.
-
Click the Address Book tab.
-
Scroll down and go to the Link postal addresses with map service section.
Contact Management Window
Manage your OX Mail's contact details with the Contact Management Window. Adding New Contacts If you are already in your address book and can see your contacts, follow the steps below:
-
Click the New Contact button to open the New contact window.
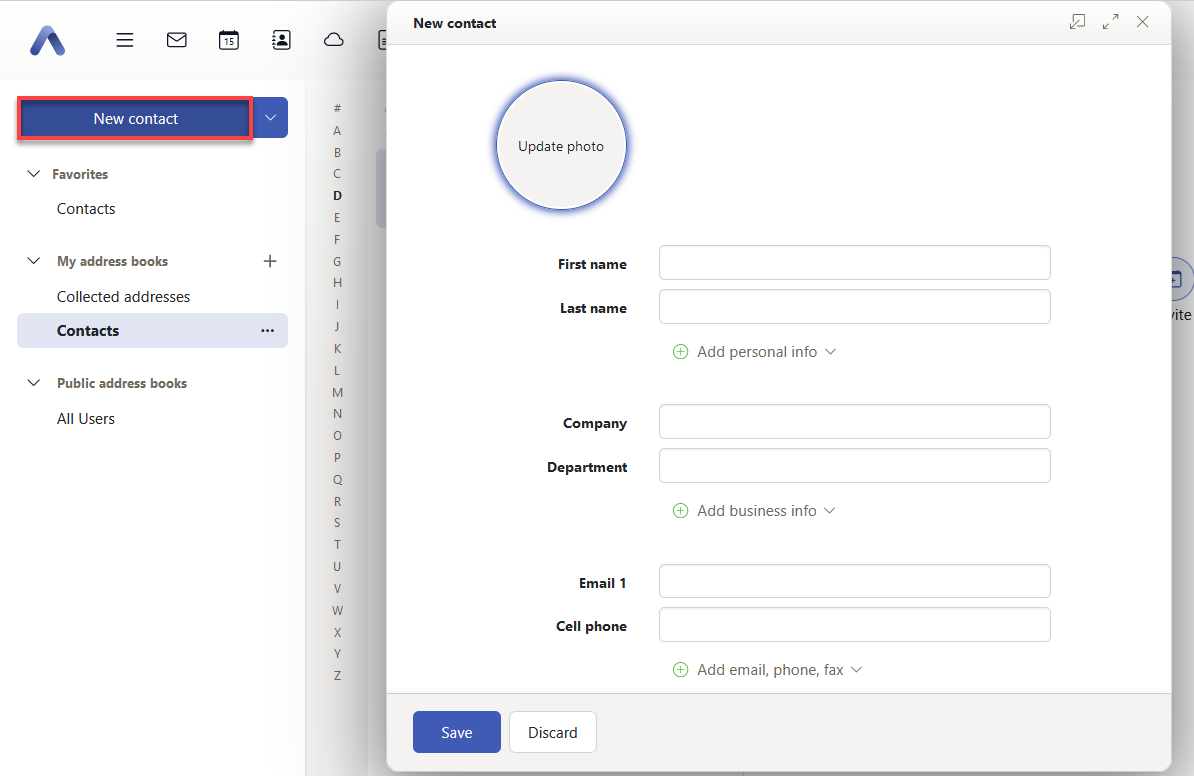
-
In the New contact window, fill in the needed details mentioned in the Contact Management Window section.
-
Finally, click the Save button.
Editing Contact Details If you have already selected an address book and you can see your contacts in the address book list, follow the steps below to open the Edit contact window:
-
Choose a contact from your address book list by clicking it.
-
Click the Edit 🖉 button.
-
In the Edit contact window, edit the data you want to edit.
-
Finally, click the Save button.
- You need the necessary permissions to edit items within the address book containing the contact.
- To review and modify permissions, click on the Actions button (represented by horizontal ellipses) next to a specific address book and choose Share/Permissions.
Contact Management Window Contents The contact management window presents the following:
- Contact picture - Click on the contact picture to edit or upload a new one.
- Contact data input fields:
- First name
- Last name
- Company
- Department
- Email 1
- Cell phone
- Additional input fields:
- Add personal info
- Add business info
- Add email, phone, fax
- Add postal address
- Add user fields
- Add attachment
- Note input field – Add notes related to the contact.
- This contact is private and cannot be shared checkbox - Checking this box maintains the privacy of a specific contact.
Clicking the Remove field
 button on certain additional fields will erase the said field along with its associated data.
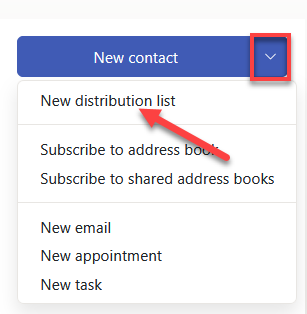
Distribution List Management Window
Manage your OX Mail's distribution list with the Distribution List Management View. Adding New Distribution Lists If you are already in your address book and can see your contacts, follow the steps below to open the Distribution list window:
-
Click the New contact Drop-down Arrow button.
-
Click the New distribution list drop-down option.
-
On the Distribution list window, follow the steps below to add a new distribution list:
-
Enter the name or label of the distribution list you want to create in the Name input field.

-
Choose the participants by following either of the steps below:
- If you want to manually add the email address , type in the contact email address you want to add manually.
OR
- If you want to automatically add email addresses from an address book , follow the steps below:
- Click the Select contacts
 button to launch the Select contacts pop-up.
 - On the Select contacts pop-up, find a specific contact, distribution list, or resource. You can employ the following options to locate a particular contact, distribution list, or resource:
- Enter a name in the Search field.
- To check the contacts of a specific address book, click the All address books drop-down menu. Choose an address book from the list. Depending on the configuration, you may select a department from the list.
- To view resources exclusively, click the All address books drop-down menu, then click the All resources option.
- Select at least one object by ticking the box that corresponds to the email contact you want to add to the distribution list.
- If required, repeat steps 2 to 3 to find and select further objects.
- The chosen items will appear beneath the list.
- To cancel the selection, click the Clear selection link.
- Alternatively, you can utilize the multi-selection functions of your system.
- Lastly, click the Select button.
- Finally, click the Create list button. You will see theDistribution list has been saved prompt as shown below, to let you know that the new distribution list has been saved successfully.

Editing Distribution Lists If you have already selected an address book and you can see your distribution lists in the address book list, follow the steps below to open the Distribution list window:
- Choose a distribution list from your address book list by clicking it.
- Click the Edit 🖉 button.
- On the Distribution list window, edit the data you want to edit.
- Lastly, click the Save button.
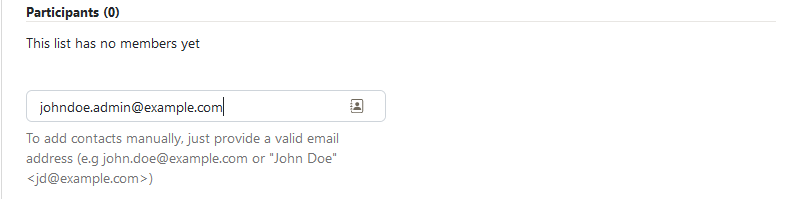
Contact Management Window Contents The distribution list management window showcases the following:
- Name input field - Provide a name for the new distribution list.
- Input field below Participants:
- Enter the email addresses of the contacts for your distribution list.
- Manually adding contacts will prompt matching suggestions. Click on a suggestion if you wish to accept it.
- Clicking the Select contacts button will launch the Select contacts pop-up, wherein you can choose contacts from all folders, all distribution lists, or a specific address book.
Summary
This is an article about the differences between Bluehost's new and old account management interfaces. It discusses how to find the same settings in each interface. The new interface is called Account Manager , and the old interface is called Rock. Key differences include finding website management under the Websites tab in the new interface and under My Sites in the old interface. Security settings are found under the Security tab in the new interface and under My Sites and the Advanced tab in the old interface.